✓ You don't need expensive supplies to begin; start simple.
✓ Practice is more important than perfection in early stages.
✓ Understanding basic color theory enhances your results.
✓ Experimentation is key to finding your unique style.
How It Works
1
Gather Your Basic Supplies
Acquire essential paints, brushes, and surfaces without overspending. Focus on quality basics to ensure a good starting experience.
2
Learn Fundamental Techniques
Familiarize yourself with core concepts like color mixing, brush strokes, and layering. These building blocks will serve as your artistic foundation.
3
Start with Simple Projects
Begin with easy subjects or exercises to build confidence and muscle memory. Don't be afraid to make 'mistakes' – they are learning opportunities.
4
Practice Consistently & Enjoy
Dedicate regular time to paint, even if it's just for short sessions. Embrace the process, celebrate small victories, and let your creativity flow.
Demystifying Your First Steps: Essential Supplies for Beginner Painters
Photo: Anastasia Shuraeva / Pexels
Embarking on your painting journey can feel daunting, especially when faced with an overwhelming array of art supplies. The good news is that you don't need to break the bank or buy every item in the art store to successfully learn how to start painting for beginners. The key is to start with a few quality essentials that will allow you to explore different techniques without being limited by poor materials. Let's break down what you truly need.
First, consider your paint type. Acrylic paints are often recommended for beginners due to their versatility, quick drying time, and easy cleanup with water. They are forgiving, allowing you to paint over mistakes relatively easily. Oil paints offer rich colors and blend beautifully, but they dry much slower and require solvents for cleanup, which can be a bit more complex for a novice. Watercolors, on the other hand, are delicate and translucent, requiring a different approach to layering and control. For your very first foray, acrylics are a fantastic choice. You'll want a basic set of primary colors (red, blue, yellow), plus black and white. From these, you can mix a vast spectrum of hues, teaching you foundational color theory right from the start.
Next up are brushes. Don't invest in dozens of specialized brushes immediately. A good starting set will include a few different shapes and sizes: a large flat brush for covering big areas, a medium round brush for general work and details, and a small detail brush for fine lines. Look for synthetic brushes, as they work well with acrylics and are durable. Natural hair brushes are often preferred for oils or watercolors but can be more expensive and require specific care. The material of the bristles affects how paint is applied and how much paint the brush holds, so experimenting with a few types as you progress can be beneficial. Remember to clean your brushes thoroughly after each use to prolong their life.
Then, you'll need surfaces to paint on. Canvas boards or stretched canvases are popular choices for acrylics and oils. For beginners, canvas boards are more affordable and easier to store. You can also use heavy-duty paper specifically designed for acrylics or mixed media, which is even more economical for practice. If you choose watercolors, you'll need specialized watercolor paper, which is thicker and designed to absorb water without buckling. Avoid regular printer paper as it will warp and tear. Having a stack of smaller surfaces for quick studies and experiments is a great way to build confidence without the pressure of a large, expensive piece.
Finally, don't forget your palette and cleaning supplies. A simple plastic palette, an old ceramic plate, or even wax paper can serve as a palette for mixing colors. For cleaning brushes, two containers of water (one for initial rinse, one for a cleaner rinse) are ideal for acrylics. Paper towels or an old rag will also be invaluable for wiping brushes and cleaning up spills. An easel can be helpful for comfort and perspective, but it's by no means essential when you're just learning; you can easily paint at a table. These basic supplies form the bedrock of your initial painting adventures, allowing you to focus on technique and creativity rather than being bogged down by an overly complicated setup. As you gain experience, you'll naturally discover what other tools might enhance your specific artistic style and needs. Exploring different art forms can also inform your choice of painting supplies.
Mastering the Basics: Fundamental Painting Techniques for Novices
Photo: Huy Nguyễn / Pexels
Once you have your essential supplies, the next crucial step in how to start painting for beginners is to grasp some fundamental techniques. These building blocks will empower you to translate your vision onto the canvas and provide a solid foundation for more advanced skills. Don't rush through these; practice them repeatedly until they feel natural. Consistency in practice is far more valuable than aiming for perfection in your initial attempts.
Color mixing is perhaps one of the most exciting and essential techniques. Understanding the color wheel is your starting point. Primary colors (red, blue, yellow) cannot be created by mixing other colors. Secondary colors (orange, green, purple) are made by mixing two primary colors. Tertiary colors are created by mixing a primary and a secondary color. Experiment extensively with mixing your primary acrylics to create a wide range of secondary and tertiary colors. Pay attention to how adding white lightens a color (creating tints) and adding black darkens it (creating shades). You'll quickly discover that a limited palette can yield an incredible array of colors. This hands-on experience is far more effective than just reading about it.
Brush strokes are another core skill. Different brushes and different ways of holding them will produce varied marks. Practice making consistent lines, varying pressure to create thicker or thinner strokes. Experiment with dry brushing, where you use very little paint on a dry brush to create a textured, broken color effect. Try wet-on-wet techniques (more common with watercolors but can be adapted for acrylics), where you apply wet paint onto a wet surface or wet paint onto wet paint to create soft, blended edges. Conversely, wet-on-dry involves applying wet paint onto a dry surface, resulting in sharper, more defined lines. Explore stippling (using the tip of the brush to create dots) and scumbling (lightly scrubbing a brush with little paint over a dry area to create texture). Each stroke adds a different character to your painting.
Layering is vital, especially with acrylics and oils. Acrylics dry quickly, allowing you to build up layers relatively fast. Start with thin washes for your underpainting – blocking in major shapes and colors. As these layers dry, you can add more opaque layers, refining details and adding depth. For oils, the 'fat over lean' principle is crucial: apply layers with more oil (fat) over layers with less oil (lean) to prevent cracking as the painting dries. This means starting with thinner, more diluted paint and gradually increasing the oil content in subsequent layers. Layering allows you to create depth, correct mistakes, and add complexity to your artwork.
Understanding values – the lightness or darkness of a color – is also paramount. A strong composition often relies on a good range of values. Practice creating a grayscale chart using just black and white paint, from pure white to pure black, with several shades of gray in between. Then, try to apply this understanding to your colored paints, identifying the value of each hue. This helps in creating contrast and form in your paintings. Don't be afraid to make 'ugly' paintings when you're just practicing these techniques. The goal is to build muscle memory and understanding, not to create a masterpiece immediately. Each attempt, successful or not, contributes to your growth as an artist.
Your First Canvas: Simple Projects to Kickstart Your Artistic Journey
Photo: Bilal Moazzam / Pexels
With your supplies ready and a basic understanding of techniques, it's time to put brush to canvas! When learning how to start painting for beginners, choosing simple, achievable projects is key to building confidence and maintaining motivation. Don't feel pressured to paint complex landscapes or portraits right away. Start small, focus on the process, and celebrate every completed piece, no matter how modest.
One excellent starting point is painting simple geometric shapes or abstract color blocks. This allows you to practice brush control, color mixing, and layering without the pressure of realistic representation. Try painting a series of squares or circles, experimenting with different colors and values within each shape. You can explore how colors interact when placed side-by-side or layered on top of each other. This exercise can also be a fantastic way to develop an understanding of composition – how elements are arranged on your canvas. Think about balance, contrast, and focal points, even in abstract forms. This foundational work can make a huge difference when you move on to more complex subjects.
Another highly recommended beginner project is painting still life with simple objects. Start with one or two items you have around the house – an apple, a coffee mug, a simple vase. The advantage of still life is that your subject won't move, and you can control the lighting. Focus on observing the basic shapes, the light and shadow, and the local colors. Don't try to render every detail; instead, aim to capture the essence of the objects. Break down the objects into simpler forms, like spheres, cylinders, or cubes, before adding detail. This simplifies the process and helps you see the underlying structure. Pay attention to how light falls on the objects, creating highlights and shadows, and how these affect the color. These observations are crucial for developing your artistic eye.
Landscapes are another popular choice, but for beginners, it's best to start with very simplified scenes. Try painting a basic sunset with distinct layers for the sky, horizon, and foreground. Focus on blending colors in the sky and creating a sense of depth through color and atmospheric perspective (objects further away appear lighter and bluer). You could also try painting a simple tree against a plain background, focusing on the texture of the bark and the shape of the foliage. Don't get bogged down by intricate leaves; instead, use broad strokes to suggest the mass of the canopy. Simplifying the subject allows you to concentrate on mastering a few techniques at a time.
Copying masterworks or even simple illustrations can also be a valuable learning tool. This isn't about plagiarism, but about understanding how other artists approach composition, color, and technique. Choose a painting you admire and try to reproduce a small section of it. You'll gain insights into brushwork and color choices that you might not discover otherwise. Remember to keep a sketchbook where you can do quick studies, practice color swatches, or jot down ideas. It's a low-pressure way to experiment and document your progress. The most important thing is to paint regularly and enjoy the process of creation. Every stroke, every color mixed, and every completed painting is a step forward in your artistic journey. Many art communities offer beginner challenges that can provide structure and inspiration for these early projects.
Common Pitfalls and Pro Tips for Aspiring Artists
Photo: Vlada Karpovich / Pexels
As you delve deeper into how to start painting for beginners, you'll inevitably encounter challenges and make mistakes. This is a natural and crucial part of the learning process. Recognizing common pitfalls and adopting smart habits from the beginning can accelerate your progress and keep your motivation high.
**Common Pitfalls to Avoid:**
* **Overspending on supplies:** It's tempting to buy every fancy brush and paint color, but this can lead to decision paralysis and a cluttered workspace. Start basic and expand as needed.
* **Comparing yourself to others:** The internet is full of incredible artists. Comparing your beginner work to professional pieces can be discouraging. Focus on your own progress and joy.
* **Aiming for perfection:** Especially in the beginning, every painting won't be a masterpiece. Embrace imperfections as learning opportunities. The goal is to learn, not to create flawless art immediately.
* **Not cleaning brushes properly:** Dried paint can ruin brushes quickly. Always clean them thoroughly after each session to maintain their shape and usability.
* **Painting too fast:** Rushing through a painting can lead to sloppy work and missed details. Take your time, observe your subject, and let layers dry properly.
* **Ignoring basic drawing skills:** Painting is essentially drawing with color. Strong foundational drawing skills (understanding form, perspective, and composition) will greatly enhance your painting.
**Pro Tips for Beginners:**
* **Start with a limited palette:** As mentioned, using primary colors plus black and white forces you to learn color mixing, which is an invaluable skill.
* **Work from dark to light (mostly):** With acrylics and oils, it's often easier to lay down your darker tones first and then build up to lighter highlights. This helps establish values.
* **Use reference photos:** Don't feel you have to paint everything from imagination. Reference photos are excellent tools for studying light, shadow, and detail. You can even trace basic outlines onto your canvas to get started.
* **Paint regularly:** Even short, 15-minute sessions are better than infrequent long ones. Consistency builds muscle memory and keeps your artistic momentum going.
* **Join a community:** Online forums, local art classes, or social media groups can provide encouragement, feedback, and inspiration. Learning from others is incredibly beneficial.
* **Take breaks:** Step away from your painting periodically. This allows you to return with fresh eyes and spot areas for improvement or correction.
* **Experiment fearlessly:** Try different techniques, colors, and subjects. Don't be afraid to 'ruin' a painting; it's just paint, and you can always start a new one. Experimentation is how you discover your unique style and preferences.
* **Keep your old paintings:** It can be motivating to look back at your early work and see how much you've improved. It’s a testament to your dedication and growth.
By being mindful of these common pitfalls and integrating these tips into your practice, you'll navigate the initial stages of painting with greater ease and enjoyment. Remember, painting is a journey, not a destination. Embrace the learning, celebrate the small victories, and most importantly, have fun with it!
Comparison
Feature
Acrylics (Best for Beginners)
Oils
Watercolors
Drying Time
Fast (minutes)
Slow (days to weeks)
Medium (minutes)
Cleanup
Water & Soap
Solvents (turpentine, mineral spirits)
Water & Soap
Opaqueness
Opaque to Transparent
Opaque to Transparent
Transparent
Blending
Can be challenging due to fast drying
Excellent, long working time
Excellent, soft transitions
Cost (Beginner Set)
Affordable
Moderate to Expensive
Affordable to Moderate
Forgiveness
High (can paint over)
Moderate (can wipe off/scrape)
Low (difficult to correct)
Skill Level
Beginner Friendly
Intermediate to Advanced
Intermediate
What Readers Say
★★★★★
"This guide made learning how to start painting for beginners so approachable! I used to be intimidated, but the breakdown of supplies and simple projects gave me the confidence to finally pick up a brush. My first canvas board actually looks like a sunset!"
Sarah J. · Austin, TX
★★★★★
"I've always wanted to paint, and this article was exactly what I needed. The focus on acrylics for beginners was spot on, and the tips on color mixing really clicked for me. I'm now painting every weekend."
David M. · Seattle, WA
★★★★★
"Following the advice on how to start painting for beginners, I completed my first simple still life. It's not gallery-worthy, but I'm proud of it, and it feels amazing to create something with my own hands. The emphasis on practice over perfection was freeing."
Emily R. · Miami, FL
★★★★★
"Good practical advice, especially on brush care and not overspending. I wish there were a few more specific project ideas, but overall, a very solid resource for anyone wondering how to start painting for beginners."
Mark T. · Chicago, IL
★★★★★
"As someone who thought I had no artistic talent, this guide was a revelation. The clear steps and encouraging tone helped me overcome my fear. I've already shared it with several friends who also want to learn how to start painting for beginners."
Chloe L. · Denver, CO
Frequently Asked Questions
What are the absolute essential supplies to start painting for beginners?
For beginners, you primarily need a basic set of acrylic paints (red, blue, yellow, black, white), a few synthetic brushes (a large flat, a medium round, and a small detail brush), and a surface like canvas boards or heavy-duty paper designed for acrylics. Don't forget a palette for mixing and two containers for water.
I'm worried I have no artistic talent. Can I still learn to paint?
Absolutely! Painting is a skill that can be learned and developed through practice, just like any other. Natural talent might give some a head start, but dedication, patience, and a willingness to learn are far more important. Focus on enjoying the process and celebrating your progress, not just the outcome.
How do I mix colors effectively as a beginner?
Start with a limited palette of primary colors (red, blue, yellow) plus black and white. Experiment by mixing small amounts of primaries to create secondary and tertiary colors. Add white to lighten (tints) and black to darken (shades). A color wheel can be a helpful visual guide, but hands-on practice is the best teacher.
Is painting an expensive hobby to start?
Painting can be as affordable or as expensive as you make it. For beginners, it's very affordable. You can get a basic set of student-grade acrylics, a few brushes, and a pack of canvas boards for under $50. Avoid buying professional-grade supplies initially; save those for when you've developed your skills and preferences.
What's the difference between acrylic, oil, and watercolor paints for beginners?
Acrylics are generally best for beginners due to their fast drying time, easy cleanup with water, and versatility (can be used opaquely or thinned for washes). Oils dry very slowly, allowing for extensive blending but requiring solvents. Watercolors are transparent, dry quickly, and are less forgiving, making them more challenging for initial learning.
Who should read this guide on how to start painting for beginners?
This guide is perfect for anyone who has an interest in painting but doesn't know where to begin. It's designed for complete novices, those who feel intimidated by art, or individuals looking for a new creative outlet and clear, actionable steps to get started.
Are there any safety concerns with painting for beginners?
With acrylics and watercolors, safety concerns are minimal. Ensure good ventilation, especially if using spray varnishes or mediums. If you choose oil paints, be aware that many solvents and some pigments can be toxic; always read labels, work in a well-ventilated area, and avoid direct skin contact. Dispose of materials responsibly.
What are some emerging trends in painting that beginners might find inspiring?
Many beginners are exploring digital painting as a complement to traditional methods, using apps and tablets. Abstract expressionism, fluid art (like pouring techniques), and mixed media art that combines painting with collage or other materials are also popular. These trends offer creative freedom and can be very engaging for new artists.
Ready to unlock your creative potential and discover the joy of painting? This guide has equipped you with everything you need to know on how to start painting for beginners. Pick up your first brush, embrace the journey, and let your artistic adventure begin today!

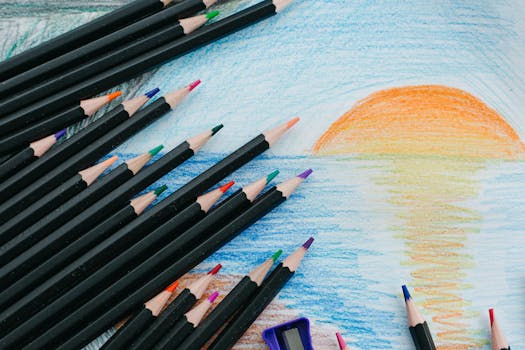 Photo: Anastasia Shuraeva / Pexels
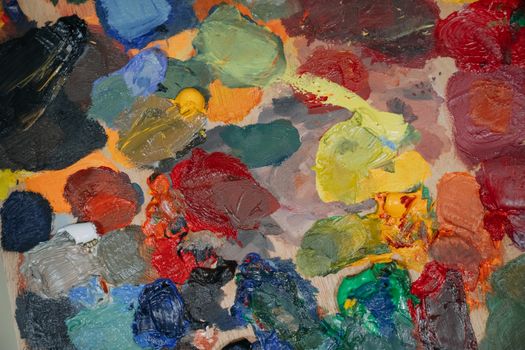 Photo: Huy Nguyễn / Pexels
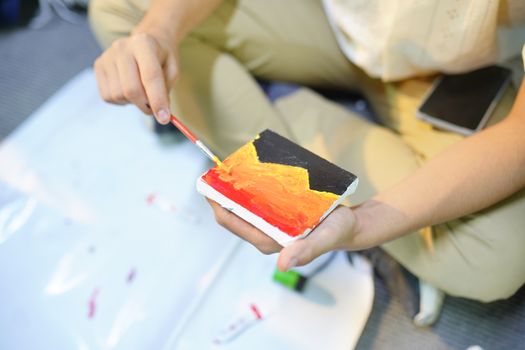 Photo: Bilal Moazzam / Pexels
 Photo: Vlada Karpovich / Pexels