
Mastering How to Draw Realistic Portraits
Transform your artistic skills and capture lifelike expressions with our comprehensive guide to realistic portraiture.
Start Drawing TodayKey Takeaways
- ✓ Realistic portraiture requires understanding of human anatomy and proportion.
- ✓ Mastering light and shadow is crucial for creating depth and form.
- ✓ Patience and consistent practice are essential for improvement.
- ✓ Observational drawing from life or high-quality references is key.
How It Works
Before diving into details, learn the average measurements and relationships between facial features. This foundational knowledge prevents common distortion errors.
Begin with simple geometric shapes like spheres and cylinders to establish the skull and jawline. This provides a solid framework for building the face.
Using your proportional guidelines, carefully position the eyes, nose, mouth, and ears. Pay close attention to their angles and distances from each other.
Apply light and shadow to create three-dimensional form and texture. Gradual transitions and understanding light sources are paramount for realism.
The Foundation: Understanding Facial Anatomy and Proportions
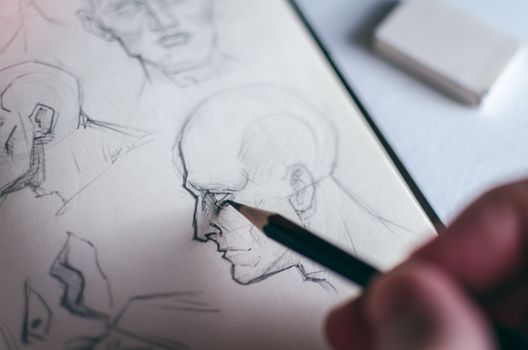 Photo: MESSALA CIULLA / Pexels
Beyond the skeletal structure, understanding the muscles of the face is critical for capturing expressions. Muscles like the orbicularis oculi (around the eyes) and the orbicularis oris (around the mouth) are responsible for subtle nuances in a smile, a frown, or a quizzical look. You don't need to memorize every single muscle, but knowing the major groups and how they pull and push the skin will dramatically enhance the realism and emotional depth of your portraits. For instance, the temporalis muscle on the side of the head, and the masseter muscle in the jaw, define the contours of the face and jawline. Even the subtle bulge of the sternocleidomastoid muscle in the neck can add character and realism to a portrait, connecting the head to the body in a believable way. Practice drawing these basic anatomical structures from different angles – front, profile, and three-quarter view – to build a mental library. This internal knowledge will allow you to draw with confidence, even when working from a less-than-perfect reference image. Remember, the goal isn't to draw a medical diagram, but to internalize the forms so your artistic interpretations are grounded in reality. Many resources are available for artists to study anatomy, from books to online courses. Investing time in this foundational step will pay dividends in the long run, setting you apart from those who merely copy what they see. Consider exploring human figure drawing as a broader approach to understanding the body's structure.
Proportions are the golden rule in realistic portraiture. While every face is unique, there are general guidelines that help establish a sense of realism. For example, the eyes are typically halfway down the head, not higher as many beginners assume. The bottom of the nose often aligns with the bottom of the ears, and the space between the eyes is roughly the width of one eye. These are not rigid rules but flexible guidelines that provide a starting point. As you observe more faces, you'll notice variations, but these variations are always relative to the established norms. Use a ruler or a measuring stick (even your pencil can serve as one) to measure proportions from your reference photo or live model. This practice trains your eye to see relationships accurately, rather than relying on assumptions. Over time, your eye will develop an intuitive sense of proportion, allowing you to sketch more freely and accurately. Don't be afraid to make mistakes and correct them – the process of adjustment is crucial for learning. Understanding these foundational elements is the first and most critical step on your journey to mastering how to draw realistic portraits.
Mastering Light and Shadow: Creating Form and Depth
The concept of 'value' is paramount here. Value refers to the lightness or darkness of a color or tone. In drawing, this translates to the range from pure white (highlights) to pure black (deepest shadows). Create a value scale, from 1 to 10, and practice rendering smooth transitions between each step. When shading a portrait, you'll apply these different values to create the illusion of three-dimensionality. Highlights occur where light directly hits the most prominent parts of the face, like the bridge of the nose, cheekbones, and forehead. Mid-tones are the general areas that are neither in direct light nor deep shadow. Core shadows are the darkest parts of the form itself, where light cannot reach. Reflected light is subtle light bouncing back into the shadow areas from surrounding surfaces, preventing shadows from looking completely flat. Cast shadows are created by one object blocking light from another, such as the shadow of the nose falling onto the upper lip.
Techniques for applying tone are varied and depend on your chosen medium. For graphite pencils, cross-hatching, stippling, circular blending, and layering are common methods. Cross-hatching involves overlapping lines to build up tone, while stippling uses dots. Circular blending with a tortillon or tissue can create smooth, skin-like textures. Layering involves gradually building up tone with light pressure, allowing for precise control and subtle transitions. The key is to avoid harsh outlines in shadowed areas; instead, let the change in value define the form. Pay close attention to the edges of shadows – some edges will be sharp (where form turns abruptly away from the light), while others will be soft and diffused (where form gently curves). This interplay of hard and soft edges adds immense realism.
Practice observing how light falls on everyday objects before tackling a complex face. Set up a simple still life with a sphere, cube, and cylinder under a single light source and draw them, focusing solely on value. This exercise will train your eye to see form through light and shadow, an invaluable skill for portraiture. Remember that skin itself has texture and reflectivity, which will influence how light behaves. Oily skin might have sharper highlights, while dry skin might appear more matte. These subtle observations contribute significantly to the overall realism of your portrait. Mastering the interplay of light and shadow is not just about making things look dark or light; it's about sculpting the face with tone, giving it volume, weight, and presence on your paper.
Bringing Features to Life: Eyes, Nose, Mouth, and Hair
The nose, often perceived as a challenging feature, can be simplified into basic geometric forms – a wedge for the bridge, a sphere for the tip, and smaller spheres for the nostrils. The key is to avoid drawing harsh outlines for the nose. Instead, use subtle shifts in value and soft edges to define its form. Observe how the light hits the bridge and tip, creating highlights, and how shadows fall beneath the nostrils and along the sides. The philtrum, the vertical groove between the base of the nose and the upper lip, is a small but important anatomical detail. Understanding the different planes of the nose – the top plane, side planes, and bottom plane – will help you render it three-dimensionally. Just like other features, the exact shape and size of the nose vary greatly from person to person, so careful observation of your reference is paramount.
The mouth and lips are incredibly expressive. Start by establishing the overall length and the curve of the mouth. The upper lip typically has a distinct 'cupid's bow' and is often slightly darker and thinner than the lower lip due to how light hits it and its muscular structure. The corners of the mouth are usually in shadow. Don't draw a hard line for the mouth opening; instead, indicate it with a soft, dark line that tapers off towards the corners, allowing the form of the lips to define it. The lips themselves are not flat; they have volume and form, often with subtle ridges. Pay attention to how light and shadow play across their surface, creating highlights on the fullest parts. The philtrum above the upper lip and the mentolabial sulcus (the groove below the lower lip) are also important to include for realism. For more detailed studies on these features, exploring specific drawing tutorials can be highly beneficial.
Hair, while seemingly complex, can be approached systematically. Avoid drawing individual strands initially. Instead, treat hair as large masses or shapes, observing its overall flow, volume, and direction. Identify the main clumps and how light and shadow define these forms, just as you would with any other object. Once the main masses are established, you can then add smaller groups of strands to indicate texture and detail. Remember that hair has roots and ends, and it grows from the scalp, following the curve of the head. Highlights on hair are often linear and follow the direction of the strands, indicating its sheen. Don't be afraid to leave some areas dark and simplified; too much detail everywhere can make hair look stiff and unnatural. The goal is to suggest texture and volume, not to draw every single strand.
Refinement and Common Mistakes to Avoid in Portrait Drawing
Another key to refinement is continuous comparison with your reference. Don't just glance; actively compare angles, distances, and value relationships. Ask yourself: Is the angle of the jawline correct? Is the shadow under the nose as dark as it should be? Are the highlights on the cheekbone bright enough? Make small, iterative adjustments rather than large, sweeping changes. This meticulous attention to detail is what separates a good drawing from a truly realistic one. Pay particular attention to the subtle nuances of skin tone and texture. Skin isn't a uniform color or value; it has variations, blemishes, and pores. While you don't need to draw every pore, suggesting texture through subtle marks and varied pencil pressure can add immense realism.
Here are some common mistakes to actively avoid when striving for realism in your portraits:
- Over-reliance on Outlines: Realism thrives on form defined by light and shadow, not hard lines. Use outlines only for initial placement and gradually soften or eliminate them as you build up values.
- Symmetry Obsession: No face is perfectly symmetrical. While proportions are important, forcing perfect symmetry will make a face look unnatural and robotic. Embrace the subtle asymmetries that make each face unique.
- Drawing Features in Isolation: As mentioned earlier, features must relate to the overall structure of the head. Drawing an eye, then a nose, then a mouth without considering their interconnectedness leads to disjointed results.
- Ignoring the Neck and Shoulders: A floating head looks unrealistic. The neck and shoulders provide context and grounding. Even if you're only drawing a bust, ensure the neck connects believably to the torso.
- Lack of Value Range: Many beginners are hesitant to push their darks, resulting in drawings that look washed out. Don't be afraid to use your darkest pencils for deep shadows; this creates contrast and depth.
- Flat Hair: Treating hair as a solid block or drawing every strand individually both lead to unrealistic results. Focus on masses, flow, and how light hits the hair to create volume.
- Copying Without Understanding: Simply copying a photo without understanding the underlying anatomy, light, and shadow will limit your growth. Strive to understand *why* something looks the way it does.
- Impatience: Realistic portraiture takes time. Rushing the process often leads to skipped steps and overlooked details. Cultivate patience and enjoy the slow build-up of your artwork.
Comparison
| Feature | Best Option (Graphite) | Alternative 1 (Charcoal) | Alternative 2 (Digital) |
|---|---|---|---|
| Medium Control | High (fine detail) | Medium (expressive) | Very High (undo/layers) |
| Blending | Moderate (stumps/brushes) | Excellent (finger/cloth) | Seamless (software tools) |
| Portability | Very High (pencils/paper) | High (messier) | Depends (tablet/laptop) |
| Realism Potential | ✓ | ✓ | ✓ |
| Ease of Correction | Moderate (erasers) | Low (smudges easily) | Excellent (undo/layers) |
What Readers Say
"This guide completely changed how I approach portrait drawing. The focus on anatomy first was a game-changer, helping me understand why my previous attempts looked 'off'. My portraits now have so much more depth and life."
Sarah J. · Austin, TX"I've tried many tutorials on how to draw realistic portraits, but this one breaks down complex concepts into easy-to-digest steps. The section on light and shadow was particularly insightful, making my shading finally look three-dimensional."
Michael R. · Seattle, WA"Before reading this, my portraits looked stiff. After applying the techniques, especially those on facial features and avoiding common mistakes, I drew a portrait of my grandmother that she instantly recognized and loved. The improvement is incredible!"
Emily C. · Boston, MA"A very thorough guide for realistic portraiture. While I found some parts quite advanced, the foundational information is gold. It truly emphasizes practice and observation, which is exactly what I needed to hear."
David L. · Denver, CO"As a beginner, I was intimidated by realistic drawing. This article made it feel approachable. I'm now confidently sketching faces and seeing real progress, which is super motivating!"
Jessica M. · Miami, FLFrequently Asked Questions
What's the most important first step in learning how to draw realistic portraits?
The most crucial first step is understanding basic human facial anatomy and proportions. Without this foundational knowledge, accurately placing features and creating a believable structure becomes incredibly difficult, leading to distorted or unrealistic results. Focus on the skull, major muscle groups, and general proportional guidelines before diving into details.
Is it possible to draw realistic portraits without a live model?
Yes, it is absolutely possible to draw realistic portraits without a live model, especially with the abundance of high-quality reference photos available today. However, working from life trains your eye to see three-dimensional form and subtle color shifts more effectively. If you're using photos, choose well-lit images with clear details and avoid distorted wide-angle shots.
How do I make my portrait drawings look less 'flat'?
To make your portraits less flat, focus intensely on mastering light and shadow (value). Ensure you're using a full range of tones from pure white highlights to deep, dark shadows. Pay attention to how light falls on the planes of the face, creating core shadows, reflected light, and cast shadows. Blending and creating smooth transitions between values will also add depth and form.
What materials do I need to start drawing realistic portraits?
You don't need many expensive materials to start. Essential tools include a range of graphite pencils (e.g., HB, 2B, 4B, 6B), a good quality drawing paper (smooth bristol or medium tooth paper works well), a kneaded eraser, a vinyl eraser, and possibly blending stumps or tortillons. As you advance, you might explore charcoal, pastels, or digital tablets.
How is drawing realistic portraits different from drawing caricatures or stylized portraits?
Realistic portraiture aims to accurately represent the subject's likeness, anatomy, and the play of light and shadow as faithfully as possible. Caricatures and stylized portraits, on the other hand, intentionally exaggerate or simplify features, forms, and expressions to achieve a particular artistic effect, often for humor or a specific aesthetic, departing from strict realism.
Who should focus on learning how to draw realistic portraits?
Anyone with a passion for art and a desire to capture the human form accurately should focus on learning realistic portraiture. It's particularly beneficial for aspiring fine artists, illustrators, concept artists, or even hobbyists who want to deepen their understanding of anatomy, light, and form, skills that are transferable across many artistic disciplines.
Are there any health or safety concerns when drawing realistic portraits?
Generally, drawing with traditional graphite pencils and paper is very safe. However, ensure good ventilation if using fixatives for charcoal or pastels. Maintain good posture to prevent back or neck strain during long drawing sessions, and take regular breaks to rest your eyes and body. Always use materials as directed by the manufacturer.
What are the emerging trends in realistic portrait drawing?
Emerging trends often involve the integration of digital tools, allowing for hyper-realistic rendering with precision and flexibility. There's also a growing appreciation for diverse representation and capturing unique individual characteristics rather than idealized forms. Artists are also experimenting with mixed media, combining traditional drawing with digital painting or even elements of photography to push the boundaries of realism.
Embark on your artistic journey to master how to draw realistic portraits today. With consistent practice and the proven techniques outlined in this guide, you'll soon be capturing the essence and likeness of your subjects with stunning accuracy and emotional depth. Pick up your pencil and start creating your masterpiece.