
Mastering How to Clean Oil Paintings Safely
Discover the essential techniques and precautions to restore the vibrancy and preserve the integrity of your cherished oil paintings.
Start Cleaning SafelyKey Takeaways
- ✓ Always test cleaning solutions on an inconspicuous area first.
- ✓ Professional conservators are recommended for valuable or delicate works.
- ✓ Dusting with a soft brush is the safest initial step.
- ✓ Water and mild soap are rarely suitable for oil paintings.
How It Works
Before any cleaning, thoroughly examine the artwork for flaking paint, tears, or unstable areas. This assessment guides your cleaning approach and identifies potential risks.
Begin by carefully removing loose dust and cobwebs using a very soft, natural-bristle brush or a soft, lint-free cloth. Work gently and avoid applying pressure.
For more stubborn surface grime, use specialized art cleaning products designed for oil paintings, applying them sparingly with cotton swabs. Work in small sections, changing swabs frequently.
If the painting has extensive discoloration, varnish issues, or requires deep cleaning, consulting a professional art conservator is always the safest and most recommended option.
Understanding the Anatomy of an Oil Painting and Its Vulnerabilities
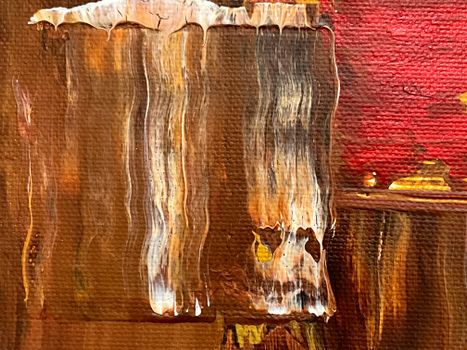 Photo: Steve A Johnson / Pexels
The support provides the structural foundation. Canvas can sag, stretch, or tear, while wood panels can warp or crack due to changes in humidity and temperature. The ground layer prepares the support for painting, creating a stable surface for the oil paints to adhere to. If the ground is unstable or improperly applied, the paint layers above it can crack or delaminate. The paint layers, composed of pigments suspended in drying oils like linseed, poppy, or walnut oil, are the heart of the artwork. Over time, these oil binders can become brittle, darken, or yellow, affecting the vibrancy and color balance of the painting. Environmental factors such as light exposure, humidity fluctuations, and airborne pollutants accelerate this aging process. UV light can cause pigments to fade and binders to break down, leading to a duller appearance. High humidity can encourage mold growth, while low humidity can cause cracking. Dust and grime accumulate on the surface, obscuring details and dulling colors. Furthermore, smoke, cooking fumes, and even household cleaning chemicals can deposit a stubborn film that discolors the artwork.
Finally, the varnish layer, applied over the dried paint, serves multiple purposes: it saturates colors, provides an even sheen, and acts as a sacrificial layer to protect the paint from environmental contaminants. However, varnish itself can yellow, become brittle, or degrade over decades, often becoming the primary culprit behind an old painting's dull or discolored appearance. Understanding these components and their vulnerabilities is the first step towards a successful and safe cleaning process. Without this knowledge, you risk inadvertently damaging the very artwork you intend to preserve. For more insights into the materials artists use, explore our guide on understanding different art mediums.
The Essential Pre-Cleaning Assessment and Environmental Control
 Photo: Greta Hoffman / Pexels
Beyond structural integrity, assess the type and extent of surface grime. Is it just a thin layer of dust, or is there a greasy film, smoke residue, or even mold? The nature of the dirt will dictate the appropriate cleaning method. Also, note the presence and condition of the varnish layer. Is it discolored, uneven, or showing signs of deterioration? An old, yellowed varnish is often mistaken for dirty paint and may require professional removal and re-varnishing, which is a complex process best left to experts.
Environmental control plays an equally vital role in both the longevity of your artwork and the safety of the cleaning process. Oil paintings thrive in stable environments. Ideal conditions typically involve a relative humidity between 45-55% and a temperature between 68-72°F (20-22°C). Fluctuations outside this range can cause the canvas to expand and contract, leading to cracking and paint loss. Before and after cleaning, ensure the painting is stored or displayed in an environment free from direct sunlight, extreme temperature changes, and excessive humidity. Avoid hanging paintings over fireplaces, radiators, or in bathrooms, as these locations are notorious for environmental instability. Good ventilation is also important to prevent the buildup of airborne pollutants. By meticulously assessing the painting's condition and maintaining a stable environment, you significantly reduce the risks associated with cleaning and contribute to the long-term preservation of the artwork.
Safe Methods for Surface Dust and Light Grime Removal
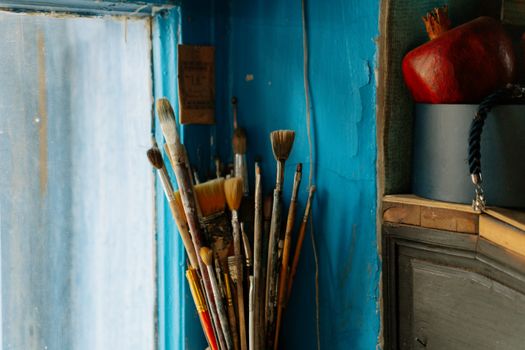 Photo: cottonbro studio / Pexels
For light surface grime that simple dusting can't remove, specialized art cleaning sponges, often called 'dry cleaning sponges' or 'smoke sponges,' can be effective. These vulcanized rubber sponges are designed to absorb dirt without introducing moisture. Gently dab or roll the sponge over small sections of the painting, observing how much grime it picks up. The sponge will visibly darken as it cleans. Ensure you use a clean section of the sponge for each new area to avoid re-depositing dirt. Never rub aggressively, as this can abrade the paint surface or push grime deeper into cracks. These sponges are excellent for removing soot, dust, and general atmospheric dirt from the non-porous varnish layer.
For slightly more stubborn, non-aqueous grime, some conservators use very mild, pH-neutral solutions, but this is where extreme caution is paramount. A common, though often debated, method involves using saliva – specifically human saliva, due to its enzymatic properties – applied with a cotton swab. Saliva contains enzymes that can break down protein-based dirt without harming the oil paint or varnish. However, this method requires a very steady hand, clean cotton swabs changed frequently, and an understanding of when to stop. It is crucial to test this (or any liquid method) in a tiny, inconspicuous area first, such as along the very edge where the painting meets the frame. Observe for any change in color, sheen, or paint transfer to the swab. If any paint comes off, stop immediately. After applying saliva, gently blot the area with a dry cotton swab to remove any remaining moisture and loosened grime. Remember, less is more when it comes to liquid cleaning on oil paintings. For deeper cleaning or specific challenges like mold removal, understanding advanced art restoration techniques is essential, though these are typically best performed by professionals.
Advanced Cleaning Challenges: Varnish Removal, Mold, and Professional Intervention
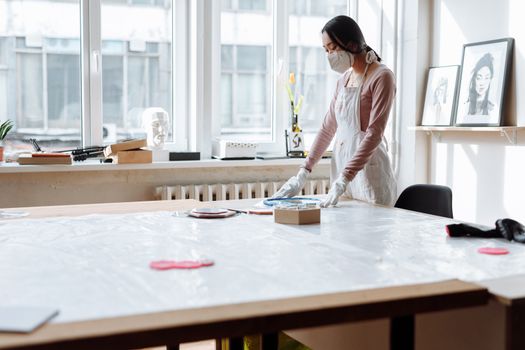 Photo: Thirdman / Pexels
Varnish removal is perhaps the most common and impactful advanced cleaning procedure. Over decades, natural resin varnishes (like dammar or mastic) yellow, darken, and become brittle, significantly altering the painting's original colors and obscuring details. Removing this old, discolored varnish and applying a fresh, stable synthetic varnish can dramatically restore a painting's vibrancy and clarity. However, varnish removal is a highly skilled process. It involves using precise solvent mixtures, carefully applied with cotton swabs, to dissolve the varnish layer without affecting the underlying paint. Different varnishes require different solvents, and the solubility of the paint layers beneath can vary. A conservator understands these chemical interactions and can precisely control the process, often working under a microscope to ensure no paint is removed. An amateur attempt can easily dissolve paint, leave solvent residues, or create uneven surfaces.
Mold and mildew present another serious challenge. These fungal growths not only stain the canvas and paint layers but also feed on organic materials, potentially weakening the support and paint. Initial, very light surface mold on the varnish layer might be carefully dabbed with a dry, soft cloth, but any widespread or embedded mold requires professional attention. Conservators use specific anti-fungal treatments and controlled cleaning methods to eradicate mold spores and minimize staining, often in controlled environments to prevent further spread. Improper cleaning of mold can spread spores, push them deeper into the canvas, or damage the paint surface.
Deeply embedded dirt, particularly from smoke damage, extensive grime accumulation, or water stains, also falls into the realm of professional intervention. These types of dirt often require complex cleaning systems, sometimes involving aqueous gels or specialized solvent blends, that are tailored to the specific type of dirt and the unique properties of the artwork. Conservators have access to analytical tools to identify the composition of both the dirt and the artwork, allowing them to formulate the safest and most effective cleaning strategy. They also work in controlled environments, minimizing risks and ensuring the long-term stability of the cleaned painting. While the allure of DIY restoration can be strong, for any advanced cleaning challenge, the investment in a professional conservator is an investment in the longevity and preservation of your valuable artwork.
Comparison
| Cleaning Method | Best For | Risks | Recommended Skill Level |
|---|---|---|---|
| Soft Brush Dusting | Loose dust, cobwebs | Minimal (if gentle) | Beginner |
| Dry Cleaning Sponge | Surface grime, soot | Abrasion if too aggressive | Intermediate |
| Saliva/Cotton Swab | Targeted protein-based dirt | Paint removal, moisture damage | Advanced/Conservator |
| Varnish Removal | Yellowed/discolored varnish | Irreversible paint damage, solvent residue | Professional Conservator Only |
| Aqueous/Solvent Cleaning | Deep grime, specific stains | Paint removal, staining, chemical reaction | Professional Conservator Only |
What Readers Say
"This guide on how to clean oil paintings saved my grandmother's portrait! The initial dusting tips were invaluable, and it helped me realize when to call a professional for the more serious varnish issues. The clarity is back!"
Eleanor Vance · Boston, MA"I had a landscape painting covered in years of kitchen grease. Following the dry sponge advice carefully made a noticeable difference, revealing colors I hadn't seen in decades. So grateful for the detailed, cautious approach."
Marcus Thorne · Austin, TX"The section on pre-cleaning assessment was a game-changer. I was about to dive in with a damp cloth, but after reading, I saw the flaking paint and knew I needed a conservator. It prevented a disaster!"
Sophia Rodriguez · Seattle, WA"While I wouldn't attempt varnish removal myself, the article thoroughly explained why professional help is crucial. It gave me confidence in deciding when to invest in expert conservation rather than risking damage. Very informative."
David Chen · Chicago, IL"As an artist, understanding the vulnerabilities of oil paintings has changed how I advise my collectors. This guide on how to clean oil paintings is a fantastic resource, emphasizing gentle care and professional limits."
Laura Bell · Miami, FLFrequently Asked Questions
What is the safest way to clean a very old oil painting?
For very old oil paintings, the safest initial step is always gentle dusting with a soft, natural-bristle brush. For anything beyond loose surface dust, especially if the painting shows signs of flaking, cracking, or discoloration, it is highly recommended to consult a professional art conservator. Their expertise prevents irreversible damage and ensures proper preservation.
Can I use water or soap to clean an oil painting?
Generally, no. Water and soap are not recommended for cleaning oil paintings. Water can cause swelling of the canvas, paint layers, or ground, and can also leave watermarks or activate soluble pigments. Soap residues can be difficult to remove and may attract more dirt or cause long-term damage. Specialized art cleaning solutions or professional techniques are required for aqueous cleaning.
How do I remove yellowed varnish from an oil painting?
Removing yellowed varnish is a highly skilled procedure that should only be performed by a professional art conservator. It involves using specific solvents to carefully dissolve the old varnish layer without affecting the underlying paint. Attempting this at home can easily lead to irreversible damage, including paint loss or uneven solvent application.
How much does it cost to professionally clean an oil painting?
The cost of professional oil painting cleaning varies widely based on the painting's size, condition, the type of grime or damage, and the conservator's expertise. Simple surface cleaning might range from a few hundred dollars, while complex varnish removal, repair, and restoration can cost thousands. Always get a detailed quote and treatment proposal from a certified conservator.
Is cleaning an oil painting at home ever a good idea compared to professional restoration?
Cleaning an oil painting at home is only advisable for the most superficial issues, such as removing loose dust with a soft brush or very light surface grime with a dry cleaning sponge, provided the painting is stable. For any significant discoloration, varnish issues, mold, or structural damage, professional restoration is always the superior and safer option. The risks of DIY cleaning often outweigh the potential cost savings.
Who should clean my valuable or antique oil painting?
Any valuable or antique oil painting should be cleaned by a certified professional art conservator. These specialists have the training, tools, and experience to assess the artwork's specific needs, perform sensitive cleaning procedures, and ensure its long-term preservation without causing damage. Look for conservators accredited by professional organizations.
What are the biggest risks when attempting to clean an oil painting myself?
The biggest risks include: removing original paint layers, causing irreversible damage to the varnish or paint, introducing moisture that leads to swelling or mold, leaving behind cleaning residues, scratching the surface, or exacerbating existing cracks or flaking. Without proper knowledge and tools, permanent damage is a very real possibility.
Will new technologies make oil painting cleaning easier in the future?
Yes, future technologies are continually being developed in art conservation. Advances in laser cleaning, targeted solvent gels, and nanotechnology are making cleaning processes more precise, less invasive, and safer for delicate artworks. However, these sophisticated methods will likely remain within the domain of professional conservators due to their complexity and specialized equipment requirements.
Armed with this comprehensive guide on how to clean oil paintings, you're now equipped to make informed decisions about your cherished artworks. Remember, gentle care and knowing when to call a professional are paramount. Preserve the beauty and history of your oil paintings for generations to come.