Mastering How to Clean Oil Paintings Safely & Effectively
how to clean oil paintings

Mastering How to Clean Oil Paintings Safely & Effectively

Unlock the secrets to preserving your cherished oil paintings, ensuring their beauty lasts for generations.

Start Cleaning Safely

Key Takeaways

  • ✓ Always test cleaning solutions on an inconspicuous area first.
  • ✓ Avoid harsh chemicals; opt for gentle, non-abrasive methods.
  • ✓ Professional conservators are recommended for valuable or delicate works.
  • ✓ Regular, gentle dusting can prevent significant dirt buildup.

How It Works

1
Assess the Painting's Condition

Before any cleaning, carefully examine the painting for cracks, flaking paint, or unstable areas. Cleaning a damaged painting can cause irreversible harm.

2
Dust Gently and Thoroughly

Use a soft, dry brush or a very light feather duster to remove loose surface dust. Always brush in the direction of the brushstrokes to avoid damage.

3
Perform Patch Testing

Apply any cleaning solution to a small, hidden area of the painting, like an edge or a dark corner. Wait to observe any adverse reactions before proceeding.

4
Clean Methodically and Patiently

Work in small sections, using minimal pressure and a light touch. Patience is crucial to avoid damaging the delicate layers of paint and varnish.

Understanding the Anatomy of an Oil Painting and Its Vulnerabilities
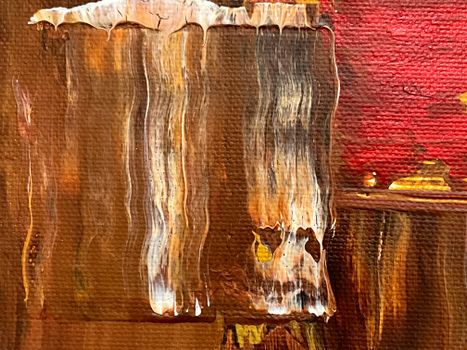
Modern abstract painting featuring textured brush strokes in brown and red hues. Photo: Steve A Johnson / Pexels
Before embarking on the delicate task of cleaning an oil painting, it's paramount to understand its construction and the inherent vulnerabilities that necessitate a cautious approach. An oil painting is far more complex than just paint on canvas; it's a layered structure, each component contributing to its integrity and susceptibility to damage. At its core is the support, typically canvas or wood panel, which provides the foundation. Over this, a ground layer (often gesso) is applied to prepare the surface, followed by multiple layers of oil paint. Finally, a varnish layer is applied, serving as a protective barrier and enhancing the colors' vibrancy. Each of these layers can react differently to environmental factors, cleaning agents, and improper handling. The primary vulnerabilities stem from the organic nature of these materials. Over time, environmental pollutants, dust, grime, smoke, and even household cooking residues can accumulate on the varnish layer, dulling the colors and obscuring details. The varnish itself can yellow, crack, or become brittle, further impacting the painting's appearance and protection. Fluctuations in temperature and humidity can cause the support to expand and contract, leading to craquelure (fine cracks in the paint layers) or even flaking paint. Direct sunlight can fade pigments and accelerate the degradation of the varnish. Improper handling, such as touching the surface with bare hands, can transfer oils and dirt, creating localized stains. Even seemingly benign elements like insects can leave behind deposits that are difficult to remove. Recognizing these vulnerabilities is the first step in formulating a safe and effective cleaning strategy. It underscores why a 'one-size-fits-all' approach is dangerous and why a thorough assessment of the painting's condition and history is non-negotiable. Understanding these delicate balances is crucial for any successful art restoration project. Furthermore, the age of the painting plays a significant role. Older paintings, especially those from before the 20th century, often utilize pigments and binding mediums that are more fragile or reactive than modern materials. Their varnish layers might be natural resins that have become highly discolored and brittle. Conversely, contemporary oil paintings might have different vulnerabilities depending on the specific mediums and techniques employed by the artist. Some artists might use non-traditional supports or mixed media, adding further layers of complexity to any cleaning endeavor. The presence of previous repairs or restorations, which may not have been carried out to modern conservation standards, also needs to be identified. These older repairs could be unstable or react unpredictably to new cleaning efforts. It's not just about removing dirt; it's about preserving the artistic and historical integrity of the object, ensuring that the process itself doesn't inflict new damage or accelerate existing degradation. This foundational knowledge empowers you to approach the task with the respect and diligence it deserves.

Essential Tools and Gentle Techniques for Surface Cleaning
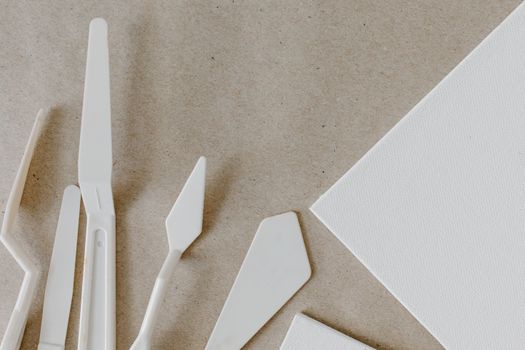
Close-up of plastic palette knives and canvas on a brown background. Photo: Tara Winstead / Pexels
Once you've assessed your oil painting and understand its construction, gathering the correct tools and employing gentle techniques are critical for successful surface cleaning. The goal here is to remove superficial dirt, dust, and grime without disturbing the delicate paint layers or the protective varnish. Starting with the least invasive methods is always the safest approach. Your toolkit should be simple, clean, and specifically chosen for delicate tasks. Essential items include a very soft, natural-bristle brush (like a high-quality artist's brush or a soft cosmetic brush), a fine-grade feather duster (ensure it's clean and doesn't shed), and a clean, lint-free microfiber cloth. For more persistent grime, distilled water and cotton swabs or balls will be necessary, but only after careful consideration and testing. Begin by gently dusting the entire surface of the painting. Hold the brush or duster at a slight angle and lightly sweep across the surface, moving in the direction of the brushstrokes. Avoid pressing down or scrubbing. The aim is to lift loose particles, not to abrade the surface. For areas with more stubborn dust or cobwebs, you can use a vacuum cleaner with a brush attachment, but maintain a significant distance (at least an inch) from the painting and use the lowest suction setting. Never let the vacuum directly touch the painting. This method is excellent for removing dust that has settled into the texture of the canvas. Following the dusting, if the painting still appears dull or grimy, you can consider a very light damp cleaning with distilled water. This step is where extreme caution is paramount. Never use tap water, as it contains minerals and chlorine that can leave residues or react adversely with the painting materials. To perform a damp cleaning, lightly moisten a fresh cotton swab or cotton ball with distilled water. The swab should be barely damp, not dripping wet. Roll the swab gently over a small, inconspicuous area of the painting, like a dark edge, and observe if any paint or varnish comes off on the swab. If the swab remains clean and no adverse reaction occurs, you can proceed cautiously. Work in very small sections, using a fresh swab for each pass to avoid redepositing dirt. Use a very light, rolling motion rather than scrubbing. Immediately follow with a dry, clean cotton swab to absorb any excess moisture. The goal is to lift the grime, not to saturate the painting. This method is effective for removing surface film but will not penetrate or remove yellowed varnish. Always err on the side of caution; if in doubt, stop and consult a professional conservator. Remember, less is often more when it comes to cleaning valuable artworks.

Advanced Cleaning: When to Use Solvents and When to Call a Conservator

Female artist deeply engaged in painting at her creative studio workspace. Photo: Andrea Piacquadio / Pexels
While gentle surface cleaning can address superficial dirt, many oil paintings suffer from yellowed varnish, embedded grime, or even old, irreversible stains that simple dusting or distilled water cannot resolve. This is where advanced cleaning techniques, often involving solvents, come into play. However, this territory is fraught with peril for the untrained individual. The decision to use solvents should never be taken lightly, as improper application can lead to irreparable damage, including paint loss, discoloration, or altering the original artistic intent. The primary goal of solvent cleaning is typically to remove old, discolored varnish layers or deeply embedded grime that has bonded with the surface over decades or centuries. Different solvents are effective on different types of varnish and grime, and selecting the correct one requires specialized knowledge. Common solvents used in conservation include various alcohols, mineral spirits, and specific solvent gels, each with its unique properties and risks. For example, some solvents can dissolve the varnish but also soften the paint layers if applied incorrectly or left on for too long. Others might be effective on certain types of grime but leave behind residues. The process involves meticulous patch testing, often in multiple areas, to ascertain the painting's precise reaction. A conservator will use micro-swabs, applying the solvent in minute quantities and observing the dissolution of the varnish or grime under magnification. This controlled, incremental approach minimizes risk. They also understand the importance of neutralization and rinsing agents to halt solvent action and prevent residues. This level of precision and understanding of chemical interactions is simply beyond the scope of a layperson. Therefore, the critical question becomes: when should you use solvents, and when should you call a professional conservator? The unequivocal answer is that if your cleaning efforts extend beyond gentle dusting and very light distilled water application, you should always consult a professional conservator. Signs that a conservator is needed include: if the painting's varnish is significantly yellowed or cracked, if there's flaking or unstable paint, if you suspect previous repairs have failed, if there are deep-seated stains, or if the painting holds significant monetary or sentimental value. Conservators have extensive training in art history, chemistry, and restoration techniques. They possess specialized tools, controlled environments, and a deep understanding of art materials. They can identify the specific type of varnish and paint, choose the appropriate solvent, and execute the cleaning with minimal risk, ensuring the painting's long-term preservation. Attempting to de-varnish or deep-clean a valuable oil painting yourself with solvents is akin to performing surgery without medical training – the risks far outweigh any potential savings. Investing in professional conservation is an investment in the longevity and integrity of your artwork, a decision that will safeguard its beauty for future generations. For more insights into the broader world of art preservation, consult expert resources.

Preventative Care and Common Cleaning Mistakes to Avoid
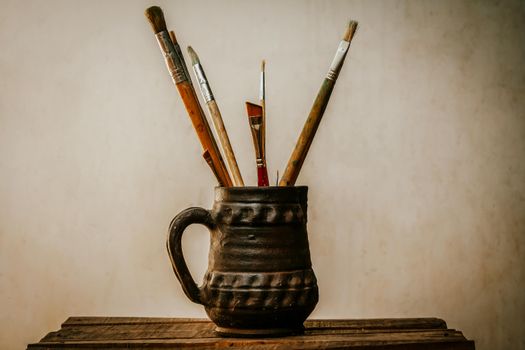
A collection of paintbrushes in a rustic ceramic jug placed on a wooden table, perfect for creative projects. Photo: Arturo Añez. / Pexels
Preventative care is undoubtedly the most effective and least invasive way to maintain the beauty and integrity of your oil paintings, significantly reducing the need for intensive cleaning. Establishing a consistent routine of environmental control and gentle maintenance can add years, if not decades, to an artwork's lifespan. The ideal environment for an oil painting is a stable one: maintain a consistent temperature between 68-72°F (20-22°C) and relative humidity between 45-55%. Avoid hanging paintings in direct sunlight, over fireplaces, near radiators, air conditioning vents, or in bathrooms, as these locations experience significant fluctuations and exposure to damaging elements. UV-filtering glass or acrylic can be considered for valuable works. Regularly dusting with a soft, clean feather duster or brush (as described in previous sections) helps prevent the accumulation of abrasive particles that can embed into the surface or attract moisture. **Common Cleaning Mistakes to Avoid at All Costs:** * **Using Household Cleaners:** Never, under any circumstances, use common household cleaning products like Windex, furniture polish, or abrasive kitchen cleaners. These contain chemicals, ammonia, or solvents that are highly detrimental to oil paint and varnish, leading to irreversible damage, discoloration, or paint loss. * **Rubbing Too Hard:** Applying excessive pressure when cleaning can abrade the surface, remove paint, or push dirt deeper into cracks. Always use a light, gentle touch. * **Using Harsh or Colored Cloths:** Abrasive cloths can scratch the surface, and colored cloths can transfer dyes to the painting, especially if damp. * **Ignoring Flaking or Unstable Paint:** Cleaning over areas with flaking or lifting paint will almost certainly cause further loss. These areas require stabilization by a conservator before any cleaning. * **Using Tap Water:** Tap water contains minerals and chlorine that can leave residues, stain the canvas, or react negatively with the paint and varnish. * **Applying Solvents Without Expertise:** As discussed, attempting to remove varnish or deep grime with solvents without professional knowledge and testing is highly risky and can cause irreparable damage. * **Not Patch Testing:** Skipping the patch test on an inconspicuous area is a critical error. Every painting is unique, and its reaction to a cleaning agent must be verified before proceeding. * **Over-Cleaning:** Sometimes, the charm of an old painting lies in its patina. Aggressive cleaning can remove this historical layer, altering the painting's character and potentially diminishing its value. * **Using Your Bare Hands:** The oils and dirt from your hands can transfer to the painting, leaving fingerprints or causing long-term damage. Always wear clean cotton gloves when handling an unframed painting. * **Rolling or Folding:** Never roll or fold an oil painting, especially an older one. This can cause severe cracking and paint loss. Transport and store paintings flat or upright in a stable, protected manner. By understanding these pitfalls and prioritizing preventative care, you can significantly prolong the life and beauty of your oil paintings, ensuring they remain cherished heirlooms for generations to come.

Comparison

FeatureProfessional ConservatorDIY Gentle CleaningDIY Solvent Cleaning (Not Recommended)
CostHighLowModerate (for supplies, high for damage repair)
Risk of DamageVery LowLow (if careful)Extremely High
Removes Yellowed Varnish✗ (without expertise) / ✓ (with damage)
Removes Surface Grime
Requires Specialized Knowledge✗ (basic)✓✓✓
Best for Valuable Art

What Readers Say

"This guide completely changed how I approach my family heirlooms. I used to be so afraid to touch them, but following the gentle dusting steps, my grandmother's portrait looks noticeably brighter and cleaner. The advice on how to clean oil paintings truly works for surface grime."

Eleanor Vance · Boston, MA

"I inherited an old landscape painting that was covered in decades of dust and cooking residue. The distilled water method described here, after careful patch testing, removed so much grime. It's amazing how much color was hidden underneath. This article is a lifesaver for preserving art."

Marcus Chen · Seattle, WA

"Thanks to this guide, I successfully cleaned a small oil sketch I bought at an antique store. The colors popped, and the details became much clearer. I stopped short of any solvent work, knowing when to call a pro, which was a key takeaway."

Sarah Miller · Austin, TX

"The information on preventative care alone is worth its weight in gold. I've adjusted where I hang some pieces and am more diligent with dusting. While I still have a few paintings that definitely need professional attention, this article gave me confidence for the less complex cleanings."

David Kim · Chicago, IL

"As a budding art collector, understanding the nuances of how to clean oil paintings is essential. This guide is incredibly comprehensive and emphasizes safety first, which is exactly what I needed to feel empowered to care for my collection properly."

Olivia Rodriguez · Miami, FL

Frequently Asked Questions

What is the safest way to clean an old oil painting?

The safest initial step for cleaning an old oil painting is gentle dry dusting with a very soft, clean brush or feather duster. For light surface grime, a barely damp cotton swab with distilled water can be used on an inconspicuous area after careful patch testing. Always prioritize gentle methods and avoid harsh chemicals.

Can I use Windex or household cleaners on my oil painting?

Absolutely not. Household cleaners like Windex, furniture polish, or any abrasive cleaning agents contain harsh chemicals, ammonia, and solvents that can severely and irreversibly damage the delicate paint and varnish layers of an oil painting, leading to discoloration, paint loss, or dullness.

How do I remove yellowed varnish from an oil painting?

Removing yellowed varnish from an oil painting is a highly specialized task that should only be performed by a professional art conservator. It involves the careful application of specific solvents which, if misused, can damage the underlying paint. Attempting this yourself is extremely risky and can ruin the artwork.

Is it expensive to have an oil painting professionally cleaned?

The cost of professional oil painting cleaning varies significantly depending on the painting's size, condition, the type of cleaning required (surface cleaning vs. varnish removal), and the conservator's expertise. While it can be a significant investment, it's often essential for preserving valuable or cherished artworks and is far less expensive than repairing damage from improper DIY cleaning.

How does cleaning an oil painting compare to cleaning a watercolor?

Cleaning an oil painting is fundamentally different from cleaning a watercolor. Oil paintings typically have a protective varnish layer and durable paint, allowing for some surface cleaning. Watercolors, being water-sensitive and unvarnished, are extremely delicate; any liquid cleaning is usually avoided, and they are primarily protected by framing under glass. Their cleaning is generally limited to dry methods by specialists.

Who should attempt to clean an oil painting themselves?

Only individuals confident in performing very gentle, non-invasive surface dusting and light distilled water cleaning (after thorough patch testing) should attempt to clean an oil painting themselves. Anyone dealing with valuable, old, or delicate paintings, or considering anything beyond basic surface cleaning, should always consult a professional art conservator.

What are the risks of improper oil painting cleaning?

Improper oil painting cleaning carries severe risks, including permanent paint loss, abrasion, discoloration, cracking, softening of paint layers, chemical reactions, and irreversible damage to the artwork's historical and aesthetic integrity. These damages often cannot be repaired, diminishing both the beauty and value of the painting.

Are there new technologies for cleaning oil paintings?

Yes, art conservation is an evolving field. Modern advancements include laser cleaning for specific types of surface grime, specialized solvent gels for more controlled varnish removal, and advanced analytical techniques to precisely identify materials and tailor cleaning approaches. These innovative methods are exclusively used by trained conservators in controlled environments.

Armed with this comprehensive guide on how to clean oil paintings, you are now better equipped to care for your cherished artworks. Remember, patience, gentle techniques, and knowing when to call a professional are paramount to preserving their beauty for generations. Start your journey to art preservation today!

Topics: how to clean oil paintingsrestore oil paintingoil painting cleaning suppliesoil painting conservationsafely clean old paintings
Leo List
Brampton weed
Adultwork EstrelaBet Vai de Bet R7 Bet Betão Galera Bet Rainbet Bet9ja Shop SportyBet BetKing Sisal Loto Foot Hollywoodbets YesPlay Odibets RushBet Jugabet BetWarrior BetCity MSport betPawa Fortebet