Mastering How to Clean Oil Paintings Safely
June 25, 2026 16 min read 3,179 words
Unlock the secrets to preserving your valuable oil paintings with expert, gentle cleaning techniques.
Start Cleaning Safely
Understanding the Anatomy of Your Oil Painting
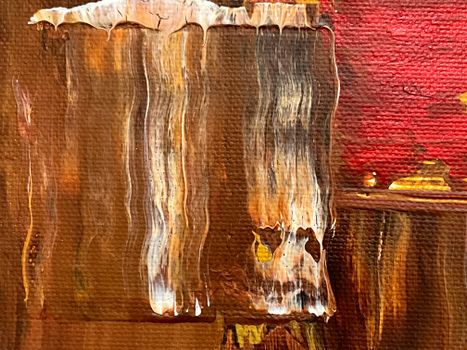 Photo: Steve A Johnson / Pexels
Before you even consider touching a cleaning solution, it's paramount to understand what an oil painting is and how it's constructed. This foundational knowledge is your first line of defense against accidental damage. An oil painting typically consists of several layers, each crucial to its integrity and longevity. At its core is the support, which could be canvas, wood panel, copper, or even paper. The choice of support significantly impacts how the painting reacts to environmental changes and cleaning agents. For example, a canvas stretched too tightly or exposed to fluctuating humidity can develop cracks more easily than a rigid wood panel. Over this support, artists usually apply a ground layer, often gesso, which prepares the surface for painting, provides an even texture, and prevents the oil from being absorbed directly into the support. This layer can become brittle over time and is susceptible to damage if not handled carefully.
Then comes the paint layer itself, composed of pigments suspended in a drying oil, such as linseed, poppy, or walnut oil. Oil paints dry slowly, forming a durable, flexible film that can withstand centuries if properly cared for. However, this film is not impervious. It can become brittle with age, suffer from 'craquelure' (fine cracks in the paint layer), or become discolored due to environmental pollutants or improper varnishing. The final layer is often a varnish, applied to protect the paint layer from dirt, dust, and UV radiation, as well as to unify the painting's appearance and enhance its colors. Old varnish can yellow, dull, or become cloudy, obscuring the original vibrancy of the artwork. Understanding these layers helps you identify what you're cleaning – is it surface dirt, discolored varnish, or something more intrinsic to the paint layer? Misidentifying the problem can lead to applying the wrong cleaning method, resulting in irreparable harm. For instance, attempting to clean discolored varnish with a mild surface cleaner will be ineffective and might push dirt further into the cracks. Conversely, using a strong solvent meant for varnish removal on a painting that only has surface grime can strip away valuable layers.
Environmental factors play a massive role in how an oil painting ages and accumulates dirt. Exposure to cigarette smoke, fireplace soot, dust, and even cooking fumes can deposit a film on the painting's surface. High humidity can encourage mold growth, while very dry conditions can cause the support and paint layers to contract and crack. Fluctuating temperatures and humidity are particularly damaging, leading to constant expansion and contraction that stresses the artwork. Therefore, knowing the environmental history of your painting can provide clues about the type of dirt and damage you might encounter. This holistic understanding of an oil painting's structure and environmental vulnerabilities is the first, most critical step in approaching its cleaning with respect and caution. It empowers you to make informed decisions and recognize when a task is beyond your capabilities, signaling the need for a professional conservator. Explore more about
art history and conservation to deepen your knowledge.
The Dangers of DIY Oil Painting Cleaning
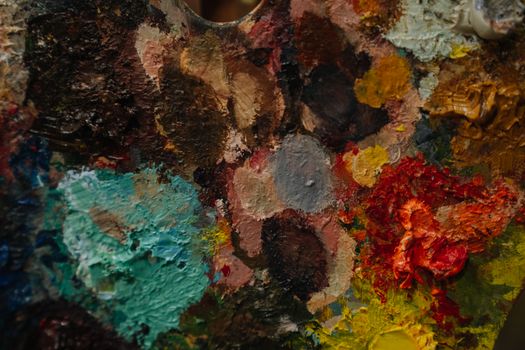 Photo: Huy Nguyễn / Pexels
While the allure of restoring a dusty, dull oil painting to its former glory can be strong, the dangers of attempting DIY cleaning without proper knowledge and tools are significant and often irreversible. Many well-intentioned individuals have inadvertently caused irreparable damage to valuable artworks, turning a simple cleaning project into a tragic loss. One of the primary risks is using inappropriate cleaning agents. Household cleaners, strong solvents, or even seemingly innocuous substances like olive oil or lemon juice, can have devastating effects on oil paint. These substances can dissolve paint, leave behind sticky residues that attract more dirt, or cause chemical reactions that lead to discoloration, cracking, or blistering of the paint layers. For example, alcohol-based cleaners can strip away varnish and even parts of the paint, while acidic solutions can etch the surface or weaken the canvas.
Another common mistake is applying too much pressure or using abrasive materials. Scrubbing with a rough cloth, sponge, or even a slightly stiff brush can scratch the delicate surface of an oil painting, removing pigment and creating irreversible textural damage. The paint layer, especially in older paintings, can be surprisingly fragile, and once it's abraded, there's no going back. Similarly, excessive moisture is a significant threat. Water can cause the canvas to swell, leading to paint delamination, or it can seep into cracks and promote mold growth. If the painting is unvarnished or has cracks, water can directly damage the paint layer.
Lack of understanding of the painting's condition is another critical danger. Without an expert eye, it's easy to misinterpret what you're seeing. Is that discoloration dirt, or is it an aged, yellowed varnish? Is that flaking paint a minor issue, or a sign of an underlying structural problem that needs professional attention before any cleaning? Attempting to clean a painting with unstable paint could cause flakes to detach, leading to permanent losses. Furthermore, many DIY cleaners fail to properly test their chosen method. Testing a small, inconspicuous area is non-negotiable. Without this step, you risk applying a damaging substance to the entire artwork.
Finally, the emotional and financial cost of damaging a cherished or valuable oil painting can be immense. Sentimental pieces hold irreplaceable memories, and historically significant artworks represent cultural heritage. The cost of professional restoration for damage caused by improper cleaning often far exceeds the cost of initial professional cleaning. In some cases, the damage may be so severe that no restoration is possible. Therefore, while the desire to clean your own painting is understandable, the potential risks far outweigh the perceived benefits of saving a few dollars. When in doubt, always err on the side of caution and consult a professional art conservator, especially for antique, valuable, or sentimental pieces. Their expertise ensures the longevity and preservation of your artwork.
Safe and Effective Methods for Cleaning Surface Dirt
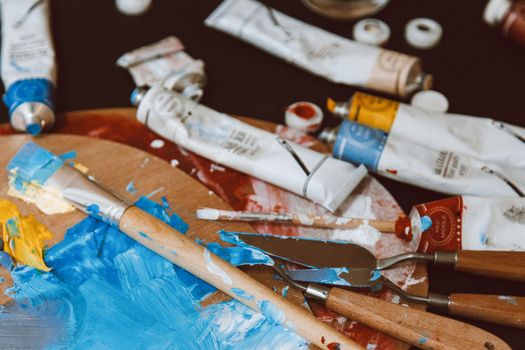 Photo: ROMAN ODINTSOV / Pexels
When it comes to cleaning oil paintings, the guiding principle is always 'less is more' and 'start with the least invasive method.' For most paintings that have accumulated only surface dust and light grime over time, a gentle approach is often all that's needed. The first and safest step is dry cleaning. Begin by using a very soft, natural-bristle brush, such as a large, clean watercolor brush or a soft cosmetic brush. Gently brush the surface of the painting in one direction, allowing the dust to fall off. Do not press hard or scrub. For more stubborn dust or cobwebs, a soft, lint-free cloth (like microfiber) can be lightly dabbed, not rubbed, across the surface. For delicate areas or intricate textures, cotton swabs can be incredibly useful. Make sure the swabs are clean and dry.
If dry cleaning isn't sufficient, and you're confident the painting is stable with no flaking paint, you can proceed to very mild, controlled damp cleaning. This is where specialized art cleaning sponges, often referred to as 'art gum' or 'smoke sponges,' come into play. These sponges are designed to lift surface dirt without moisture or chemicals. They are tacky and absorb dirt as you lightly dab or roll them across the surface. Always start from a corner or edge and work inwards, changing to a clean section of the sponge frequently. These are particularly effective for removing soot or smoke residue.
For general grime that has adhered to the varnish layer, a very dilute, neutral pH solution can sometimes be used, but this must be approached with extreme caution. A common, relatively safe option is distilled water, sometimes with a tiny drop of a very mild, non-ionic detergent (like Orvus WA paste, specifically formulated for conservation). The key is the application: use a cotton swab barely dampened with the solution. Roll the swab over a small, inconspicuous area, like the bottom edge or a dark corner, and observe closely for any changes in the paint or varnish. If the swab picks up only dirt and no paint color, and the surface looks clean without any dulling or stickiness, you can proceed with extreme care.
Work in small, manageable sections, changing swabs frequently. The goal is to lift the dirt, not to scrub or saturate the painting. Immediately follow with another cotton swab dampened with only distilled water to remove any detergent residue. This 'rinse' step is crucial. Allow each section to dry completely before moving to the next. If at any point you see paint color on your swab, or if the paint feels sticky, or if you notice any dullness or changes in the varnish, stop immediately. This indicates you are either removing paint or damaging the varnish. Remember, cleaning a painting should never be rushed. Patience and meticulous attention to detail are your best allies. When in doubt about the nature of the grime or the stability of the painting, always consult a professional art conservator. Their expertise is invaluable for preserving the integrity and beauty of your artwork for future generations. For more advanced techniques, consider researching
professional art restoration practices.
When to Call a Professional: Recognizing the Limits of DIY
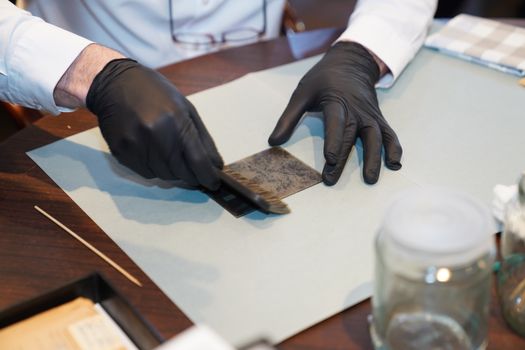 Photo: Tahir Xəlfə / Pexels
While understanding how to clean oil paintings can empower you for minor tasks, it’s equally, if not more, important to recognize when a painting requires the specialized hand of a professional art conservator. Overestimating your capabilities or underestimating the complexity of a painting's condition is the fastest route to irreversible damage. There are several clear indicators that signal it’s time to step away from the cleaning supplies and pick up the phone to a conservator.
Firstly, any sign of flaking, lifting, or unstable paint is an immediate red flag. If you see paint chips detaching from the canvas, or if the paint feels brittle and loose, any attempt at cleaning, even gentle dusting, could exacerbate the problem and lead to significant paint loss. Conservators have specialized techniques and materials to consolidate unstable paint layers before any cleaning is attempted. Secondly, if the painting has suffered physical damage, such as tears, punctures, dents, or significant cracks in the support, it needs professional intervention. Cleaning such a painting without first addressing the structural issues can cause further deterioration.
Discoloration that appears to be more than just surface dirt also warrants professional assessment. Yellowed varnish, smoke damage deeply embedded in the paint, or complex chemical changes within the paint layers themselves cannot be safely addressed with household remedies. Varnish removal, in particular, is a highly skilled procedure that requires specific solvents, precise application, and an understanding of the individual painting's materials and age. Incorrect varnish removal can strip away original glazes, alter the painting's tonality, or even damage the underlying paint.
Furthermore, if the painting holds significant monetary, historical, or sentimental value, it's always best to consult a professional. The risk of devaluing or destroying a precious artwork through amateur cleaning is simply too high. A professional conservator has the training, experience, and specialized equipment to assess the painting's condition accurately, determine the most appropriate and safest cleaning methods, and execute them with precision. They work in controlled environments, using reversible materials and techniques that adhere to ethical conservation standards.
Another scenario requiring professional help is mold or mildew growth. While small, superficial mold spots might sometimes be carefully removed, extensive or deeply embedded mold can indicate underlying humidity issues and requires expert treatment to prevent further spread and damage to the canvas and paint layers. Finally, if you simply feel unsure or uncomfortable about any aspect of the cleaning process, that hesitation is your intuition telling you to seek expert advice. A conservator can provide a condition report, recommend treatment options, and give you peace of mind that your artwork is in the best possible hands. Investing in professional conservation is an investment in the longevity and preservation of your valuable art. It ensures that the beauty and integrity of the painting are maintained for generations to come, far beyond what any DIY effort could achieve.
**Common Mistakes to Avoid When Cleaning Oil Paintings:**
* **Rubbing aggressively:** Can abrade paint layers and scratch the surface.
* **Using household cleaners:** Products like Windex, dish soap, or furniture polish are highly damaging.
* **Applying too much moisture:** Can cause swelling, mold, and paint delamination.
* **Ignoring flaking paint:** Cleaning unstable paint will cause irreversible loss.
* **Using abrasive materials:** Sponges, coarse cloths, or paper towels can scratch.
* **Not testing in an inconspicuous area:** Always test any solution or method first.
* **Direct sunlight exposure:** While not a cleaning mistake, direct sun can cause fading and accelerate degradation.
* **Lack of ventilation:** Using solvents without proper ventilation is dangerous for both you and the painting.
* **Attempting varnish removal yourself:** This is a highly specialized skill best left to professionals.
* **Using saliva:** While sometimes mentioned in historical contexts, it's unhygienic and inconsistent for modern conservation.
By understanding these pitfalls, you can protect your cherished artworks from common, preventable damage.
